
Building and Deploying Jekyll Sites using Docker - Part Two
In Part 1 of this writeup I described how I’m using Docker to simplily my [Jekyll] static site builds on my local machine. In this, Part 2, I’m going to show how I’m using the exact same approach in my CI/CD pipeline using Azure DevOps and [Travis-CI][travis].
Using Jekyll and Docker within an Azure DevOps Pipelne
Building a Jekyll static site using Azure DevOps is really very simple. In fact, most of the set up is done for you!
Before you get started, make sure you already have a Azure DevOps organisation and project set up. If this if your first time, you should probably take a look at the Azure DevOps documentation and some of the getting started docs. After you’ve done that, create your Azure Pipeline, and point Azure DevOps at the location of your code.
First, Select a Pipeline Template
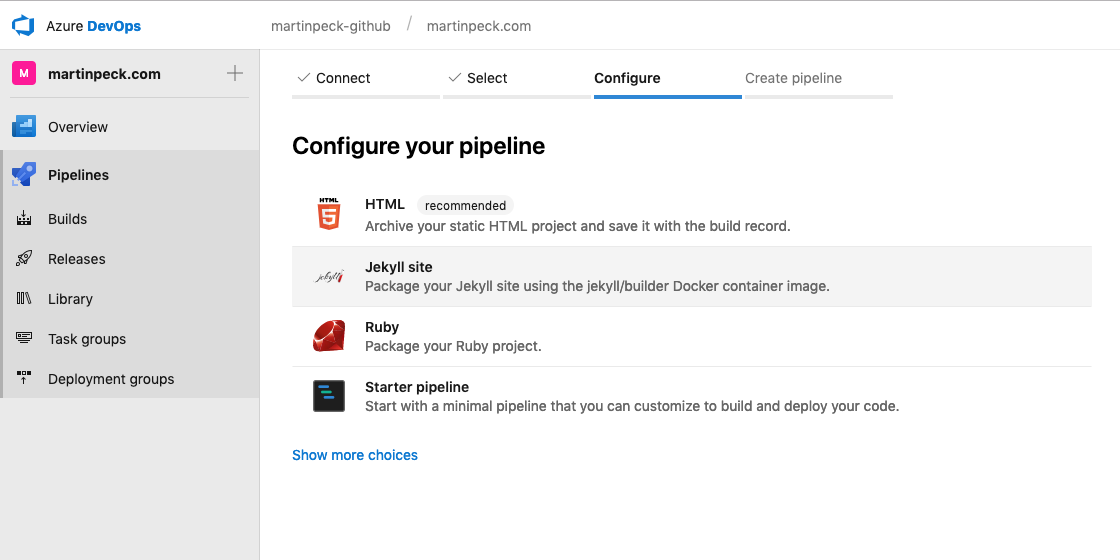
When you create your first Azure build Pipeline, Azure DevOps will suggest some Pipeline templates based upon the contents of your git repository. At this point, you should be offered “Jekyll site” as a template. As you can see, the description for this template is exactly what we want…building Jekyll using a docker container image.
Review the Pipeline YAML
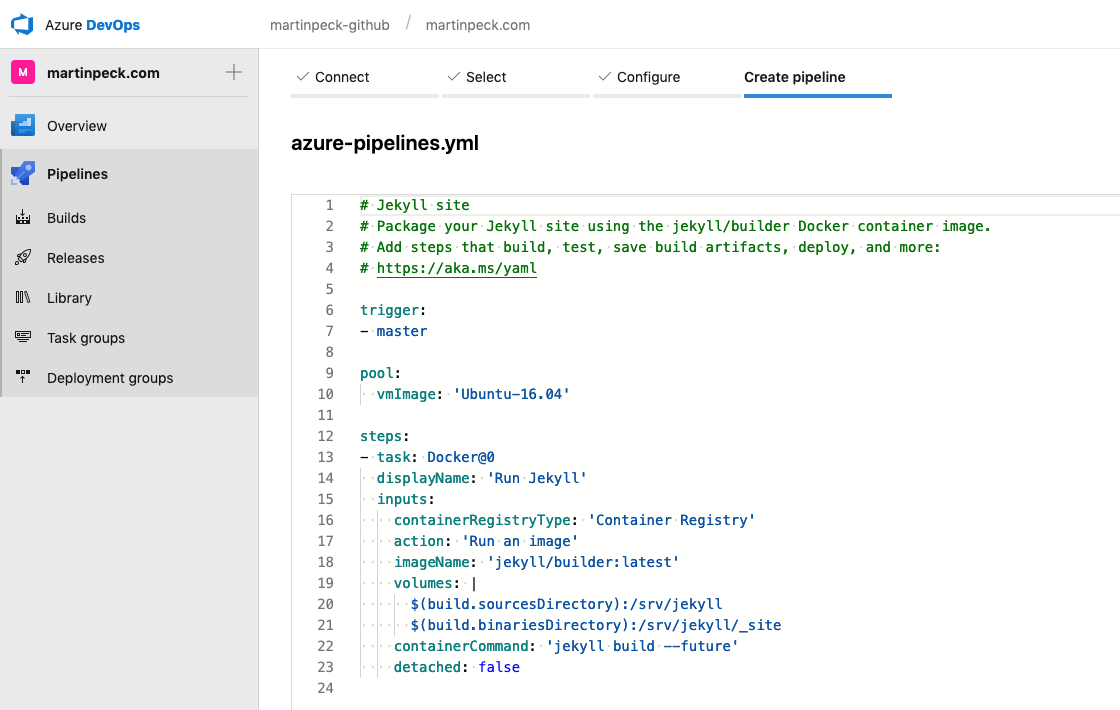
Azure DevOps build pipelines are defined as .yaml files. This file will get committed to your source repository as azure-pipelines.yaml. The template is actually pretty good. As you can see, it’s using jekyll/builder:latest container image to run Jekyll and build your site. The command it runs is jekyll build --future which will build posts that are dated in the future, allowing this CI pipeline to check that your future dated posts aren’t broken.
The only needed to make a few changes to my azure-piplelines.yaml file to make it work for my GitHub Pages blog:
- I changed the trigger from
mastertogh-pagesso that builds were triggered on the right branch - I added another task to my build, to take the output of Jekyll build (i.e. the
_sitefolder that Jekyll generates) and to publish it from my build as an Artifact
Here is my full azure-pipelines.yaml:
# Jekyll site
# Package your Jekyll site using the jekyll/builder Docker container image.
# Add steps that build, test, save build artifacts, deploy, and more:
# https://aka.ms/yaml

trigger:
- gh-pages

pool:
  vmImage: 'Ubuntu-16.04'

steps:
- task: Docker@0
  displayName: 'Run Jekyll'
  inputs:
    containerRegistryType: 'Container Registry'
    action: 'Run an image'
    imageName: 'jekyll/builder:latest'
    volumes: |
      $(build.sourcesDirectory):/srv/jekyll
      $(build.binariesDirectory):/srv/jekyll/_site
    containerCommand: 'jekyll build --future'
    detached: false
- task: PublishBuildArtifacts@1
  inputs:
    artifactName: 'drop'
    pathtoPublish: '$(build.binariesDirectory)'
    publishLocation: 'Container'
Run your First Pipeline Build
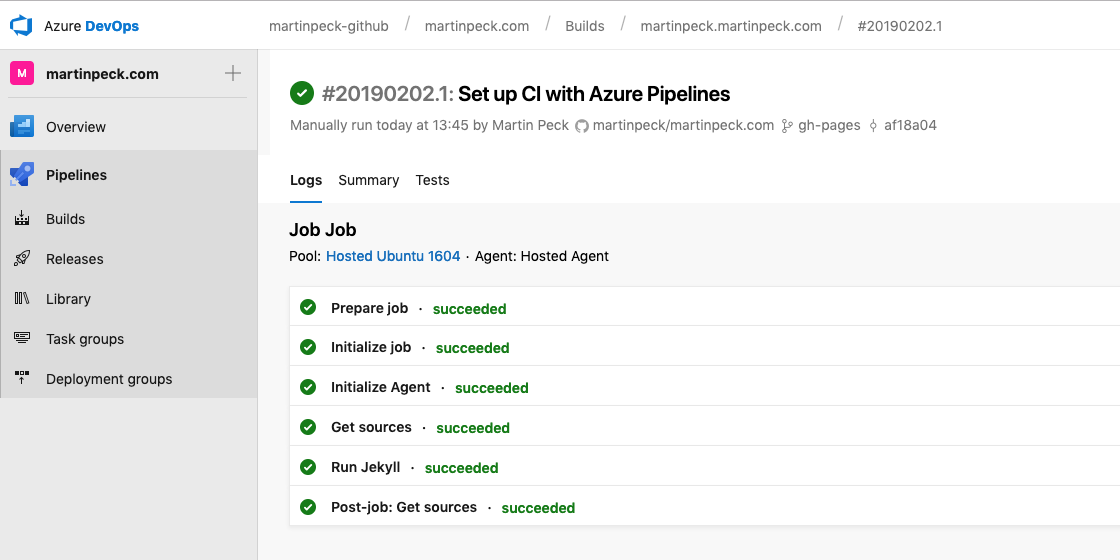
After you’ve reviewed/edited your .yaml file, Azure DevOps will ask you to commit the file and will then run a build.
And that’s it!
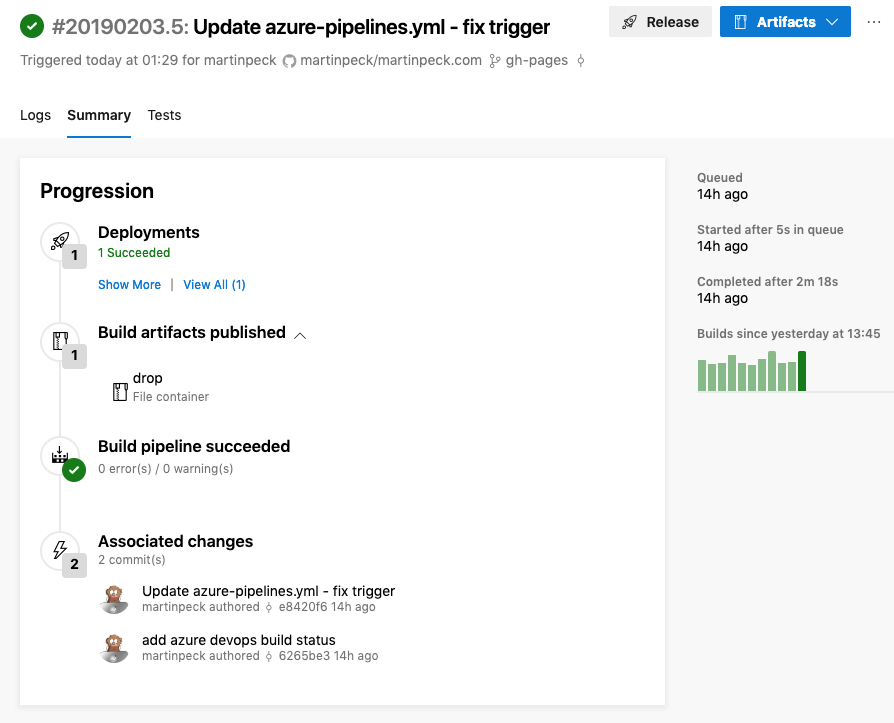
Now, every time I push changes to my gh-pages branch this Pipeline build will trigger, it will pull the source from GitHub, use the Jekyll container image to build my site, and will then take the generated site and publish it as a build artifact.
What Next?
If you simply want to run a CI build to confirm that your site builds, then you’re done. In my case, I publish the _site directory so that I can then use it within an Azure DevOps Release Pipeline
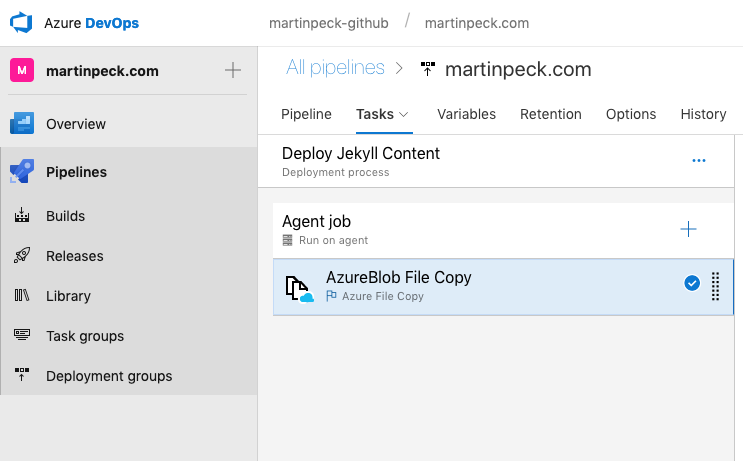
My Release pipeline is incredibly basic:
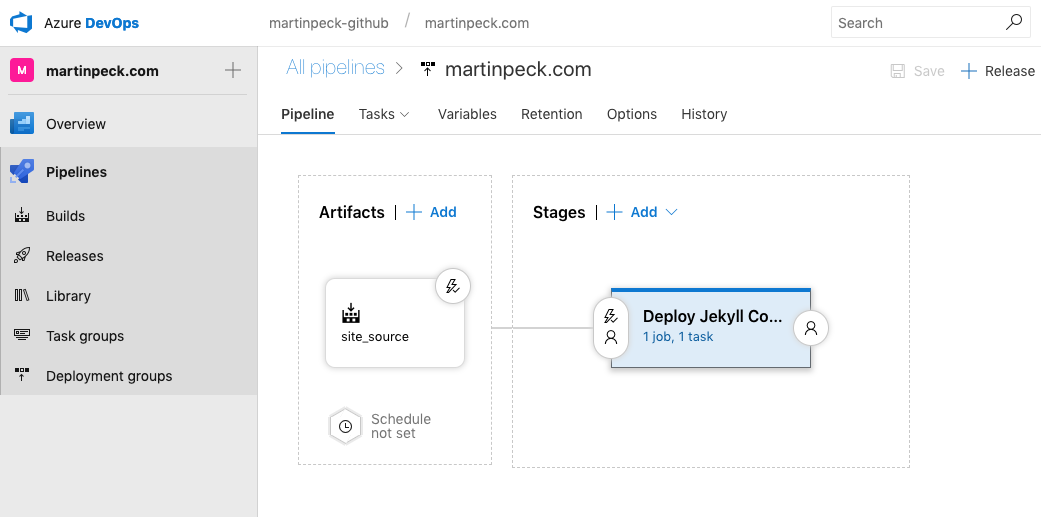
- it gets triggered when a build is successful
- it has a single stage
- that stage has a single task, that performs an AzureBlob File Copy to an Azure Storage Account that has been enabled to serve static files.
The end result is that the static site, built by Jekyll, is then published to the internet, and I can then review the output of the build. In my case, the build output ends up at:
https://martinpeck.z35.web.core.windows.net/
Using Jekyll and Docker within a Travis-CI Build
Until recently, I was using [Travis-CI][travis] to perform CI builds of my blog. There are plenyy of examples of how to build Jekyll sites on Travis-CI, including the “offical” instructions on the Jekyllrb.com website. However, almost all of these examples use the native Ruby support that Travis has. I wanted to see how easily I could get Travis-CI to use the same docker images that I was using for my local build, so that my local build and my CI build would be as similar to each other as posibble.
I won’t to into massive detail here, but the end result was that I got my build to work, but it wasn’t nearly as simple as it was on Azure DevOps, and I had to work around a permissions issue.
My final .travis.yaml looks like this:
language: python

services:
  - docker

script: docker run --rm -it --volume="$PWD:/srv/jekyll" jekyll/jekyll:3.8 /bin/bash -c "chmod a+wx . && jekyll build"

# branch whitelist, only for GitHub Pages
branches:
  only:
  - gh-pages     # test the gh-pages branch
  - /pages-(.*)/ # test every branch which starts with "pages-"
You can refer to the official Travis-CI docs for Docker builds, but the highlights are:
- I use the
pythonlanguage for this build purely to show that I’m not making use of anyrubyservices supplied by Travis-CI - I’ve added
dockeras a service. This allows you to usedockercommands in your script - My scrip runs
docker - I’ve had to work around a permissions issue
You’ll notice that I’m not running jekyll build directly, but instead I’m running a bash command that first uses the chmod command to change the permissions on the current directory (inside the container) before running the jekyll build. Without this, the container didn’t have permissions to write content to the _site folder.
If found several referneces to this issue, with no good conclusion. For me, this chmod hack worked fine, but it’s what caused me to take a look at the Azure DevOps pipeline, where I found the docs and support for docker within CI builds much more comprehensive.
In Summary…
I’m pretty happy with my Azure DevOps CI pipeline, and the Release pipeline that deploys my site. It was pretty easy to set up, and I’m happy that the way it builds the Jekyll site is pretty much the same as the way I built it locally.
I was actually quite surprised how difficult it was to do the same thing with Travic CI. I guess that the simple path for Travis CI builds is to use the Ruby language services they offer.
If you want to take a closer look at the builds I have set up then here are the links you’ll need:
The Azure DevOps Builds:
https://dev.azure.com/martinpeck-github/martinpeck.com/_build?definitionId=2
The azure-pipelines.yaml defintion of the builds:
https://github.com/martinpeck/martinpeck.com/blob/gh-pages/azure-pipelines.yml
The Azure DevOps Releases:
https://dev.azure.com/martinpeck-github/martinpeck.com/_release
The Travis Build (that I’ll be switching off soon):